How to plant a new container-grown tree
Guidelines for successful tree planting
Download a printer friendly (Adobe Acrobat PDF) version of this document
When to plant - Fall and winter are the best seasons to plant in our area. Planting during this period allows more time for tree roots to become established so that they can meet the water needs of the leaves in hot weather. Trees can be successfully planted in spring and summer, but proper watering is especially critical for trees planted during hot weather.Fall is the best season to plant in most temperate areas of California. Avoid trees that are pot-bound or have been topped or excessively pruned up ("lollipop" style). A properly-grown tree should stand upright without the aid of the pot stake. Also beware of wounds on the trunk and any evidence of root decay.
Picking good planting stock - In general, the smaller the tree, the easier it will be to establish successfully. Larger trees take longer to become established. Ideally, the top should have a single main stem with branches distributed along it. Avoid trees whose main stem has been cut back or which have been excessively pruned up ("lollipop" style) or have large, unhealed pruning wounds on the trunk. A properly-grown tree will be thicker at the base and taper gradually toward the top. Avoid any tree that shows large circling roots near the trunk. Such roots will never straighten out. Also avoid trees with decayed or mushy roots.
Preparing a site and planting your tree - Investing a little time and
effort at planting will pay off in terms of faster tree establishment and better
growth and vigor. A good quality tree may still perform poorly if it is not
properly planted in a well-prepared site.
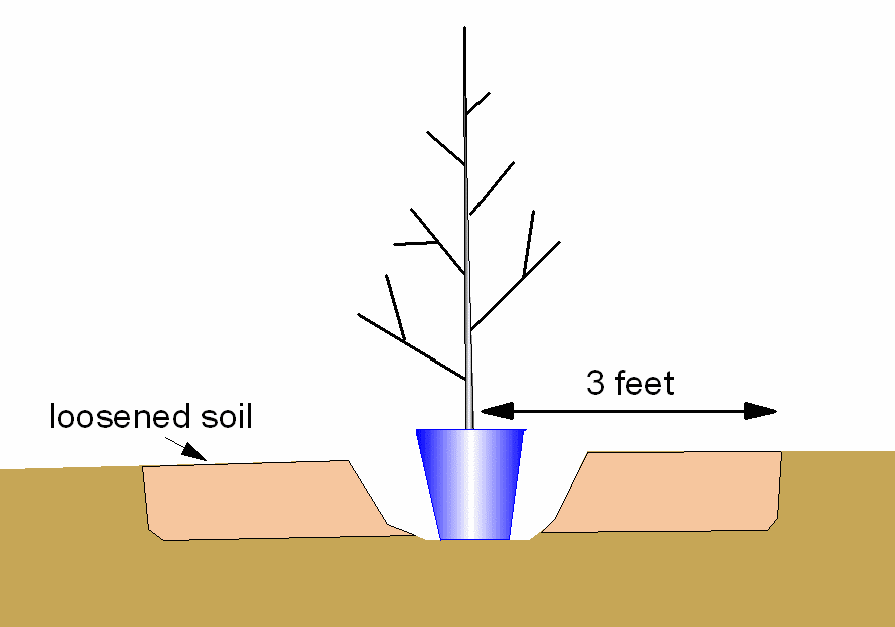
1. Prepare the soil at the planting site. Soils in subdivisions are highly compacted during construction, and tree roots cannot grow in such highly compacted soil. Most tree roots grow in the upper 1.5 to 2 feet of soil and spread far beyond the tree's canopy. Your tree will perform best if you can loosen the soil in the rootzone to a depth of at least 1 ft and a distance of at least 3 ft from the trunk in all directions. You can do this by spading and turning over the soil with a shovel in the same manner that one prepares the soil in a garden. You can also use power equipment to do the job. Soil augers, trenchers, or backhoes are the most effective for big jobs. Most rototillers do not till deep enough.
2. Dig the hole. Once you have turned over the soil at the planting
site, digging the actual planting hole will be fairly easy. The hole should
be no deeper than the depth of the tree's root ball. The tree root ball
should rest on firm soil at the center of the hole so that the tree will
not settle excessively. Make the planting hole about twice as wide as the
pot to allow for spreading of roots away from the rootball.
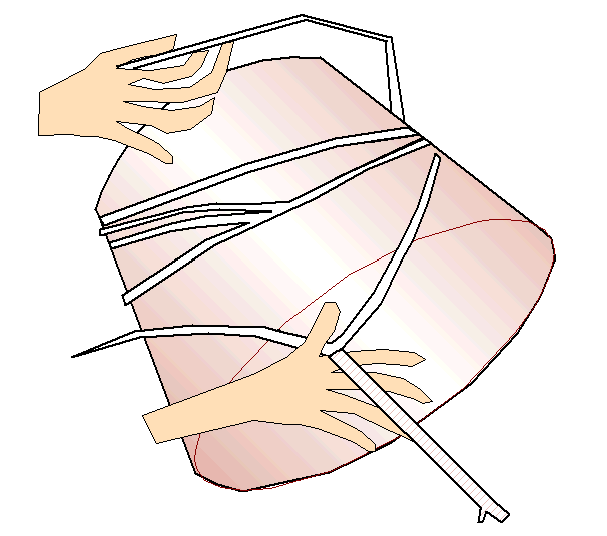
3. Unpot the tree. Carefully remove the tree from the
pot to avoid breaking off roots. Unwind all circling roots. Circling roots
will not straighten themselves out and can eventually strangle the tree
as they expand. Kinked, circled, or knotted roots that cannot be straightened
out should be cut off cleanly with sharp pruning shears. Because roots are
critical for tree survival and establishment, try to minimize the amount
of root removal and damage.
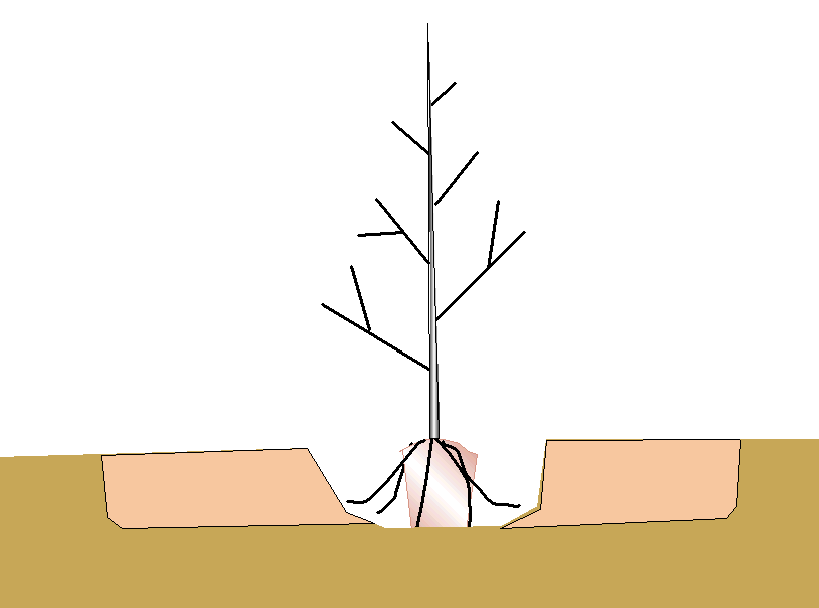
4. Set the tree. Gently place the tree in the planting hole, laying
roots out so they radiate away from the trunk. Don't allow roots to kink
or double back at the edge of the hole - expand of the hole so that roots
can spread out if necessary. Make sure that when the tree is set in the
hole, the top of the root ball is slightly above the final grade of the
soil. The root crown (where the first roots emerge from the trunk) should
be set a bit higher than the surrounding soil so that water doesn't pool
next to the trunk.
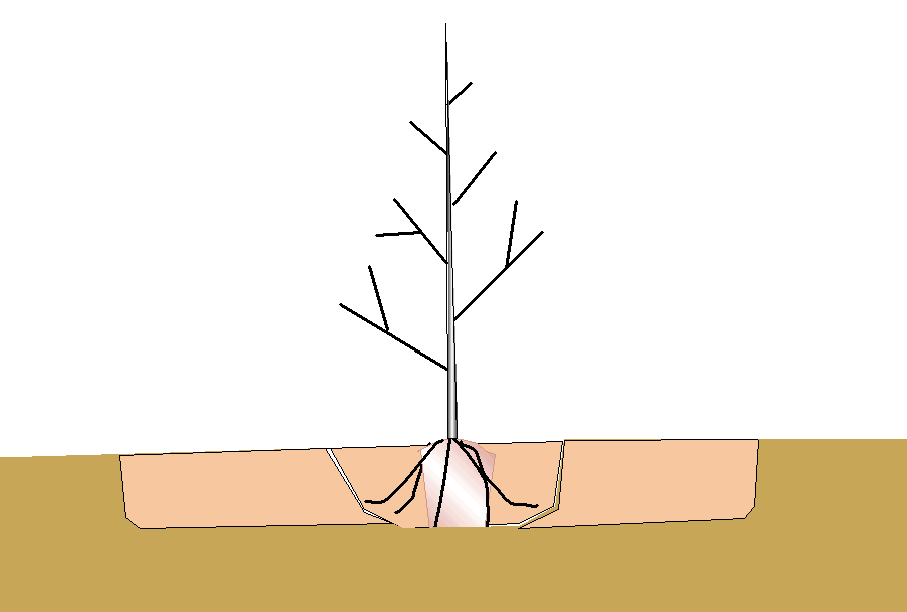
5. Backfill the hole. Add soil to the planting hole and firm it
down moderately with your hand to remove large air gaps. Avoid creating
a sharp boundary between the container soil and the surrounding soil by
gently breaking up the container soil as you refill the hole. Be sure
that the tree is set at the proper height as you fill the hole. After
the soil settles, the soil line of the tree in the pot should be the same
as the final planted soil line. Once the hole is filled, water the rootball
area with a low flow from a hose to settle the soil. If the top of the
root ball sinks below grade after watering, gently pull it back up to
level.
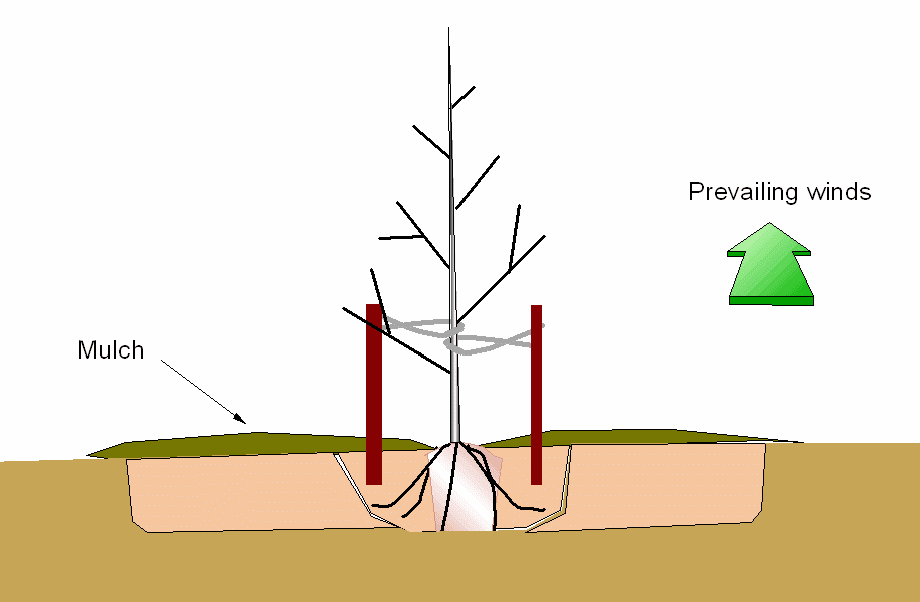
6. Stake only if necessary. Remove the pot stake, if any, that came with the tree. If the tree appears stable, staking is not needed (this is more likely to be the case for smaller trees). If staking is necessary, hold the trunk with one hand to find the height at which the unsupported top can stand up on its own and will spring back to a vertical position if lightly flexed. Position flexible support ties (no wires) about 6 inches above that point. A loose fitting figure 8 cushions the tree from rubbing against the stake and allows for some movement that stimulates the tree to develop taper. Use 2 stakes, placed in a line perpendicular to the prevailing wind direction. Place stakes beyond the container root ball, and cut stakes off about 2 inches above the ties to keep the trunk and branches from rubbing on the stakes. Remove support ties and stakes as soon as the tree becomes established, normally within one year of planting. Additional stakes or fencing may be needed around the tree to provide protection from people, pets, and equipment.
7. Mulch your tree. Use 3 to 4 inches of an organic mulch, such as bark or wood chips, to cover the soil surface at the planting site, but keep the mulch depth to 1 inch or less next to the trunk. Mulch should extend at least 2 to 3 ft away from the trunk on all sides. Mulch will help your tree get established by moderating soil temperatures, suppressing weed growth, and conserving soil moisture. If planting in a lawn, turf should be kept at least 2 to 3 ft from the trunk of newly planted trees because it suppresses tree growth.
 |
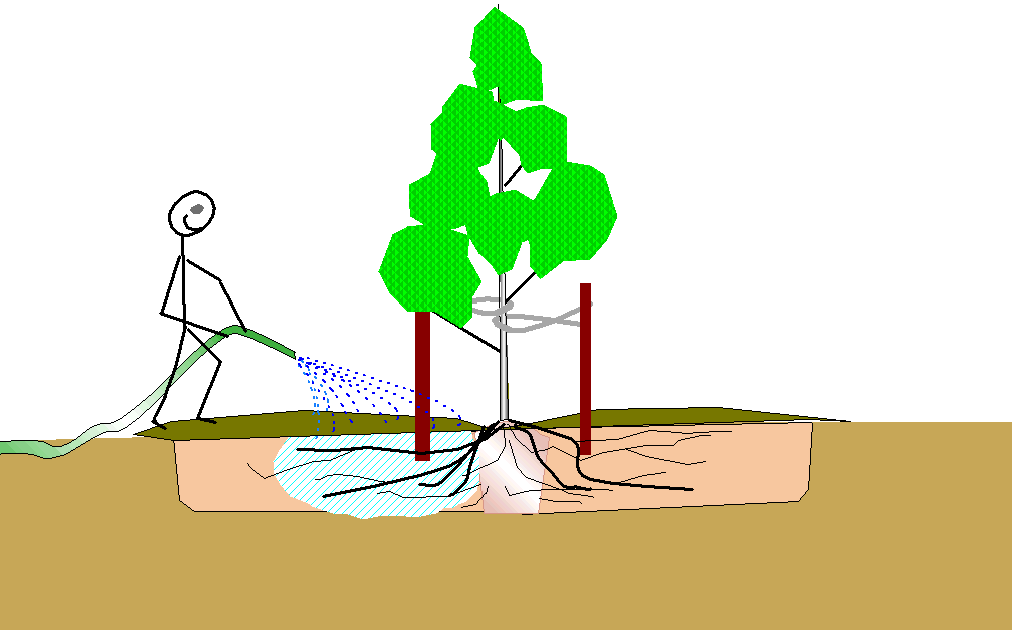 |
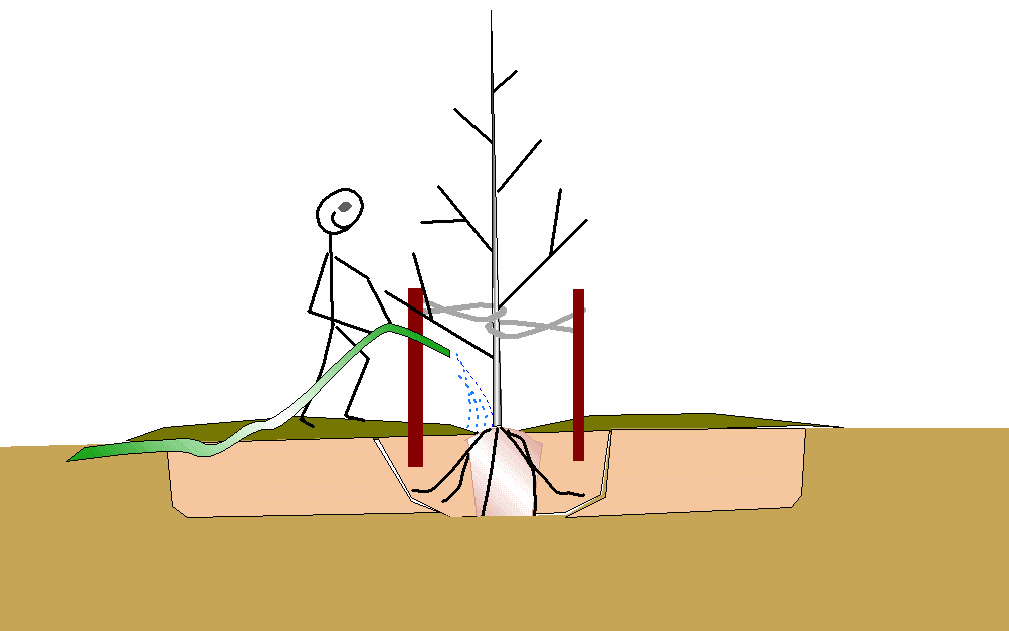
8. Water your tree. Until new roots grow into the soil of the planting site, your tree will be dependent on the water that is held in the original root ball area. Especially if you are planting in late spring or summer it is critical that this root ball area does not dry out. In areas with clay soils, the surrounding soil will pull moisture out of the porous soil mix the tree is potted in, so your tree may dry out much more quickly than you expect. Check and, if needed, water your new tree right at the root ball every few days for the first several weeks during the growing season. The soil around the rootball should remain moist though not saturated. Within several months, when sufficient numbers of roots have grown into the loosened, mulched soil surrounding the rootball, you can direct your irrigation to that area. If you plant in fall or winter, you will probably need to water your new tree every two to four weeks during its first summer, more often in especially hot periods. If your tree is planted in spring or later, you may need to water as often as once a week throughout the first summer. When irrigating, apply enough water to thoroughly wet the root zone to a depth of at least a foot, but don't water so often that the soil stays waterlogged.